Changing Your MacBook Air Clock Format
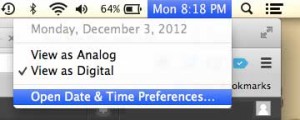
There are actually a bunch of different options available for setting up your clock, but we are just going to focus on using the 24-hour option. If you want to see all of the choices available to you, simply look around the Date & Time Preferences menu to see if there is something you prefer. Step 1; Click the time at the top-right corner of the screen.
Step 2: Click the Open Date & Time Preferences option at the bottom of the menu.
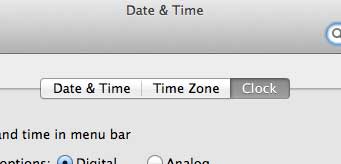
Step 3: Click the Clock tab at the center of the window.
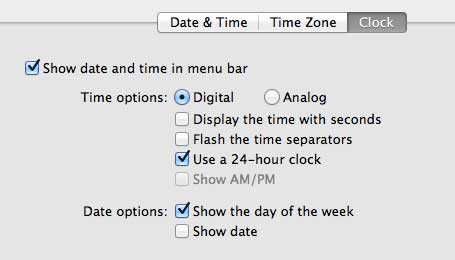
Step 4: Check the box to the left of Use a 24-hour clock. Note that this will uncheck the box below it, to the left of Show AM/PM.
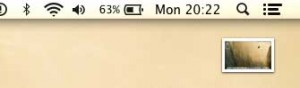
You will note that the AM or PM that was previously displayed to the right of the clock at the top of the screen is now gone. If it is after 12:59, you will also see that the 24-hour format is in effect.
If you want to return to the previous clock state, you can simply follow these instructions again, but choose to use the Show AM/PM option again. He specializes in writing content about iPhones, Android devices, Microsoft Office, and many other popular applications and devices. Read his full bio here.