Our guide below will show you where to find the automatic spell checking option in Outlook 2013 so that you can turn it off. Once this setting is disabled, Outlook will simply send your email message when you click the Send button, without scanning the text of the message for any spelling errors.
How to Disable the Spell Checker in Outlook 2013
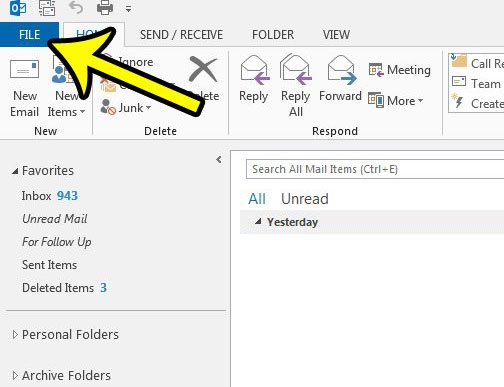
The steps below are going to assume that the spell checker tool in Outlook 2013 is currently enabled, and that you wish to turn it off. This will prevent Outlook from automatically checking your messages for spelling errors before you send them. You can still initiate a manual spell check by clicking the Spelling & Grammar button on the Review tab before sending a message. Step 1: Open Outlook 2013. Step 2: Click the File tab at the top-left corner of the window.
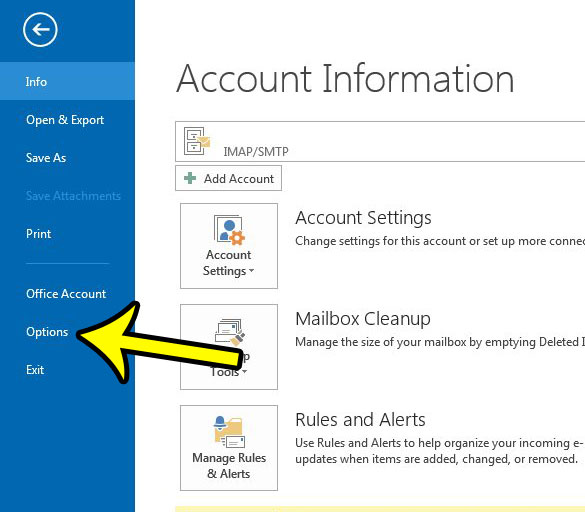
Step 3: Click the Options button in the column at the left side of the window.
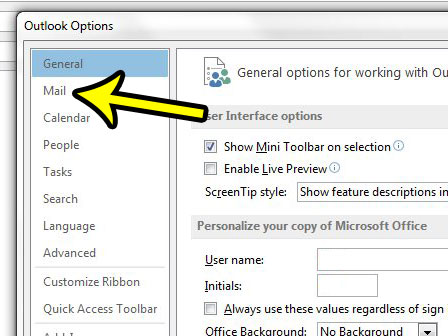
Step 4: Click the Mail tab at the left side of the Outlook Options window.
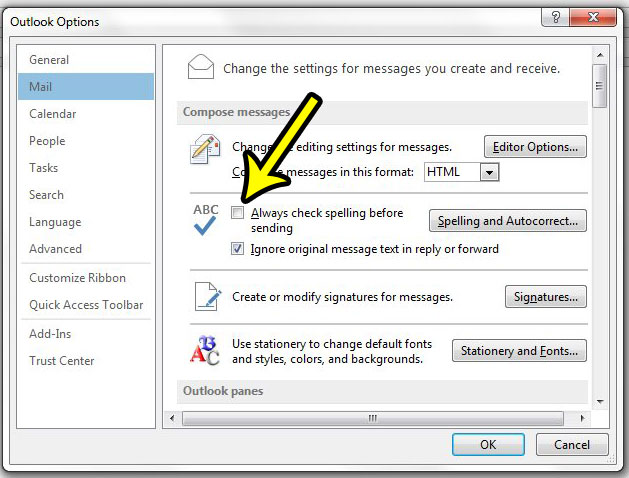
Step 5: Uncheck the box to the left of Always check spelling before sending, then click the OK button at the bottom of the window.
As mentioned earlier, this will stop the automatic email spell check that occurs when you send an email. You will only be able to check your spelling by manually running the spell checker from the Review tab. Would you like Outlook to check for new messages more often? Learn how to change the send and receive settings in Outlook 2013 so that you receive new email messages in your Outlook inbox at a faster rate. He specializes in writing content about iPhones, Android devices, Microsoft Office, and many other popular applications and devices. Read his full bio here.


