One way to resolve this is to include headings at the top and side of the spreadsheet. This makes it much simpler to determine which column and row is which, ensuring that you are able to better track what type of information belongs in the individual cells that you are viewing.
How to Include the Column Letters and Row Numbers When Printing a Spreadsheet in Excel 2013
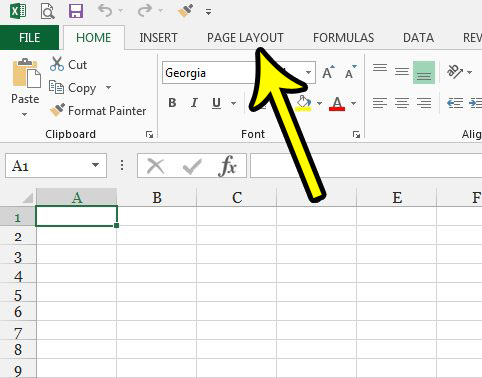
The steps in this article are going to add the column letters and the row numbers when you print a spreadsheet. Note that there are separate options for showing and printing these headings so you will be able to configure them as needed. Additionally these settings apply only to the spreadsheet that you are currently editing. This doesn’t affect future or existing spreadsheet print settings. Step 1: Open your spreadsheet in Excel 2013. Step 2: Click the Page Layout tab at the top of the window.
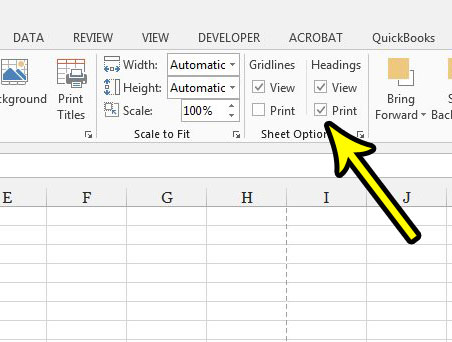
Step 3: Click the box to the left of Print under Headings in the Sheet Options section of the ribbon.
As mentioned earlier, you can also elect to check or uncheck the View option for the Headings as well. This controls whether or not they are visible on your computer screen. Adding the headings to your spreadsheet is just one setting that can improve the readability of your printed data. Read our Excel printing guide for some additional tips that can help resolve some of the frustration that typically accompanies spreadsheet printing. He specializes in writing content about iPhones, Android devices, Microsoft Office, and many other popular applications and devices. Read his full bio here.