Fortunately this is something that you can adjust in Outlook 2013, thereby allowing you to save those meeting requests in your inbox after you have acted upon them. Our tutorial below will help you find and change this setting.
How to Keep Meeting Requests in Your Inbox in Outlook 2013
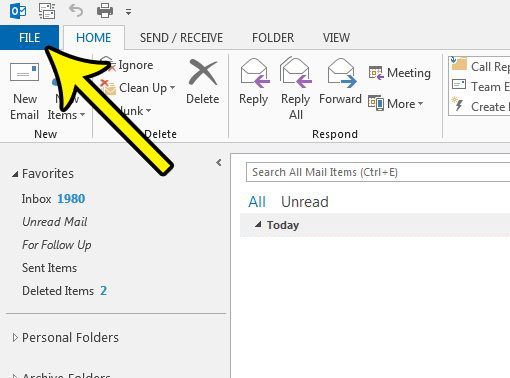
The steps in this article are going to stop Outlook 2013 from automatically deleting meeting requests from your Inbox once you have responded to them. This will allow you to go back and find those meeting requests later if you need to reference them for any reason. Step 1: Open Outlook 2013. Step 2: Select the File tab at the top-left of the Outlook 2013 window.
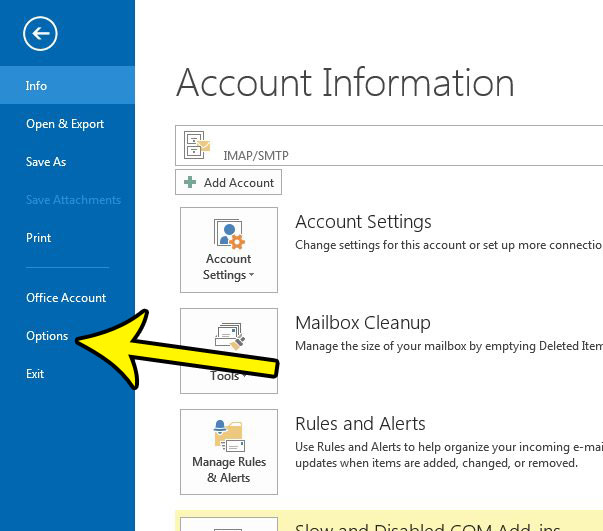
Step 3: Choose the Options button at the left side of the window.
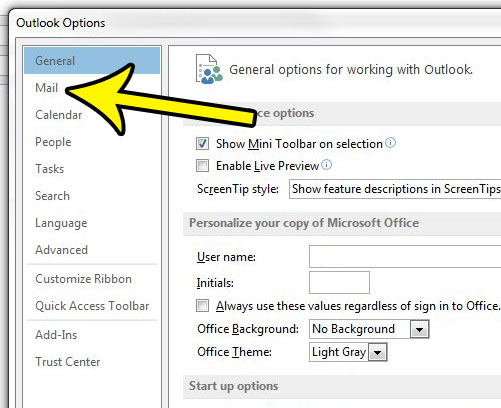
Step 4: Select the Mail tab in the left column of the Outlook Options window.
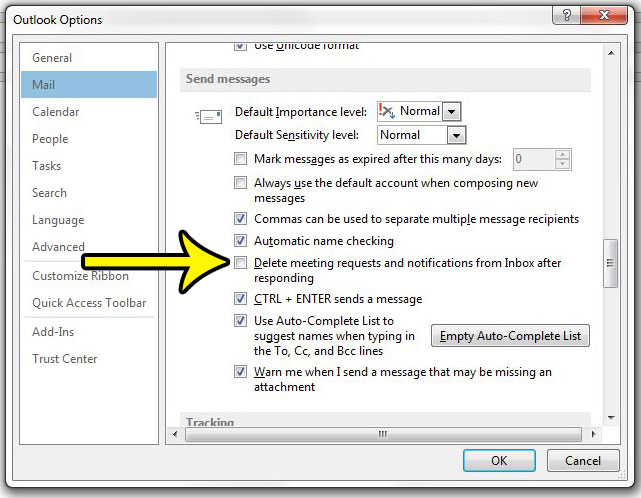
Step 5: Scroll down to the Send messages section of the menu, then click the box to the left of Delete meeting requests and notifications from Inbox after responding to remove the check mark. Click the OK button at the bottom of the window to apply the change and close the window.
Do you find that Outlook is keeping old emails and files in the Deleted Items folder when you though that they had actually been deleted? This article will show you a setting to change if you would prefer that Outlook delete those files so that they are no longer taking up space on your computer. He specializes in writing content about iPhones, Android devices, Microsoft Office, and many other popular applications and devices. Read his full bio here.