The steps below will show you how to move columns in Excel without replacing data in other existing cells. This allows you to keep all of the data in the spreadsheet, but simply reorganize the way that it is laid out.
How to Move a Column in Excel
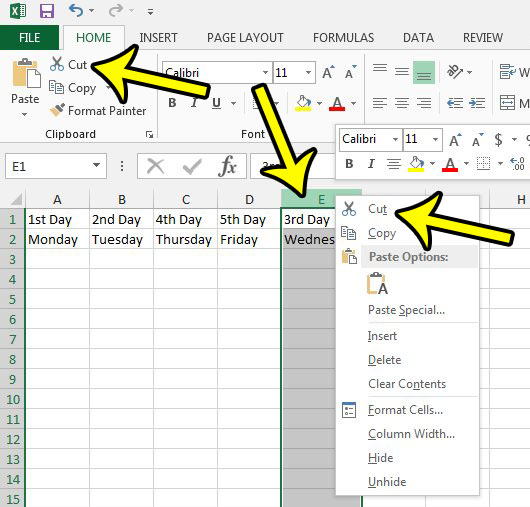
The steps in this guide were performed in Excel 2013, but will work in most other versions of Excel as well. If you have cells in your column that contain formulas, those formulas will update automatically to account for the new position of the column. Step 1: Locate the column that you wish to move, right-click the column letter, then select the Cut option. Note that you can also click the Cut button in the Clipboard section of the ribbon, or you can press Ctrl + X on your keyboard.
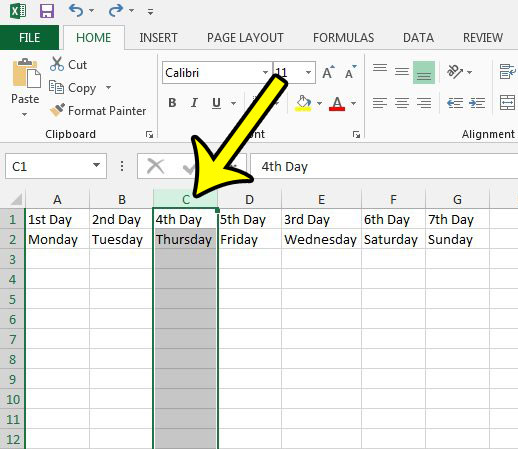
Step 2: Select the column letter to the right of where you want to move the column. I want to move my cut column between column B and column C, so I have selected column C.
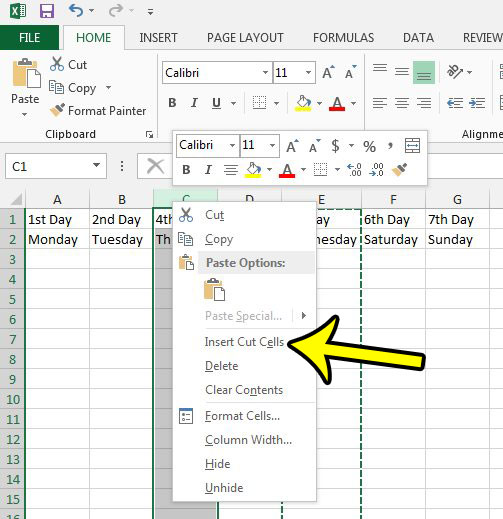
Step 3: Right-click the selected column letter, then click Insert Cut Cells.
Alternatively you can click the Insert button in the Cells section of the ribbon, then click the Insert Cut Cells option.
Note that you can use this same method to move more than one column as well. You can click and hold on a column letter, then drag left or right to select additional columns. The same method of cutting and pasting rows will then apply. Is there a column in your spreadsheet that you would like to remove from view, but you aren’t ready to delete it? Learn how to hide columns in Excel so that the data is still available if you need it, but it isn’t visible to anyone that is viewing the spreadsheet. He specializes in writing content about iPhones, Android devices, Microsoft Office, and many other popular applications and devices. Read his full bio here.


