But prior to iOS 11, iPhone owners were restricted to uploading videos they created from their device using the front or rear facing camera. Now there is an option to use a screen recorder, which can take a video of what is happening on your screen. Our tutorial below will show you how to enable the screen recorder on your device, then show you how to start and stop recording a video.
How to Use the Screen Recorder on an iPhone
The steps in this article were performed on an iPhone 7 Plus in iOS 11.2.2. You will need to be using at least iOS 11 if you want to use the screen recorder, as it is not available in versions lower than that. Additionally, recorded videos can be quite large. Be sure to free up some storage space first if you think you are going to be using the screen recorder on your iPhone a lot. Step 1: Open the Settings menu.
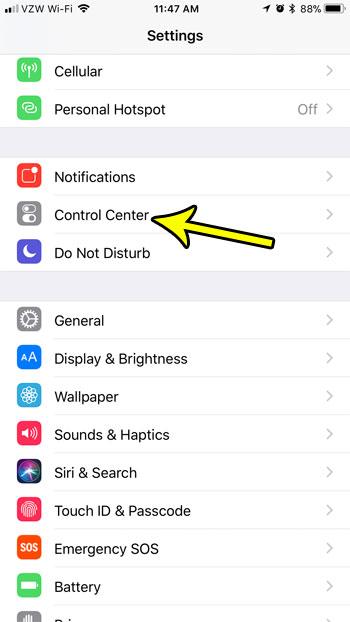
Step 2: Choose the Control Center.
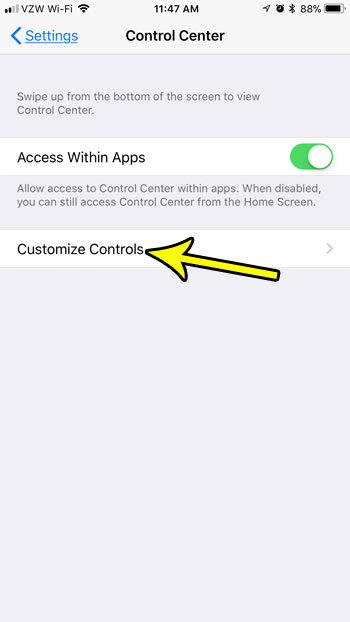
Step 3: Touch the Customize Controls option.
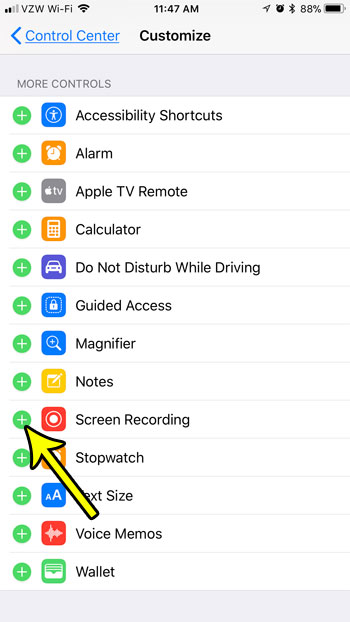
Step 4: Scroll down and tap the green + button to the left of Screen Recording.
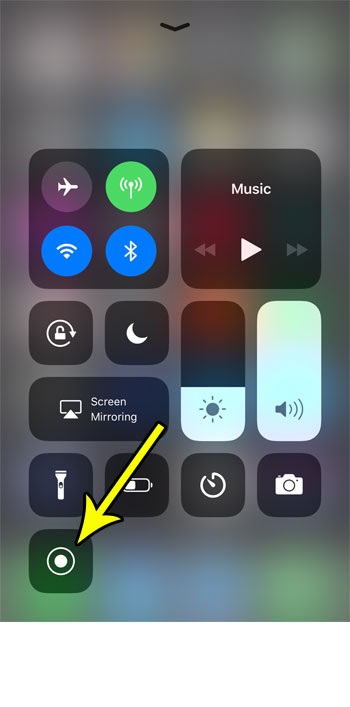
To use the screen recorder, swipe up from the bottom of your screen to open the Control Center, then tap the record button, which will start a three second countdown.
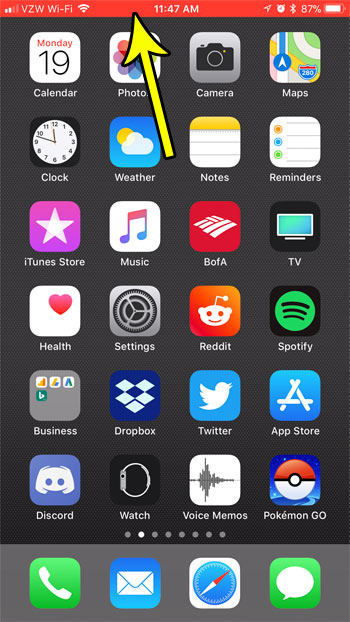
Once you are done recording, touch the red bar at the top of the screen.
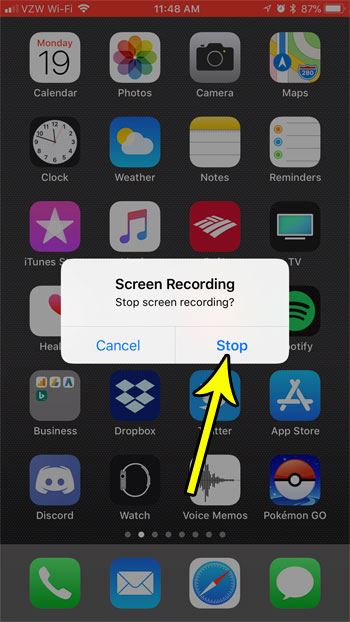
You can then tap the Stop button to finish recording the video.
The recorded video can be found in the Photos app, inside the Videos folder. He specializes in writing content about iPhones, Android devices, Microsoft Office, and many other popular applications and devices. Read his full bio here.